If you've ever stripped a car down to bare steel after a collision repair or restoration, you know the clock starts ticking the second that metal is exposed. Moisture, road salt, and humidity will attack it fast. That's where **direct to metal primer** comes in — a coating designed to bond directly to bare metal, seal it from corrosion, and provide a toothy surface for your paint system. In this article, we'll cover what direct to metal primer is, when to use it, how to apply it correctly, and why skipping it can turn a clean repair into a rust bucket.
What Exactly Is Direct to Metal Primer?
Direct to metal primer — often called DTM primer — is a specialized coating formulated to adhere to bare ferrous and non-ferrous metals without needing a separate etching step. Unlike standard primers that rely on a pre-etch or conversion coating, DTM primers contain corrosion-inhibiting pigments and resins that chemically bond to the metal. They also provide a uniform surface for the next layer, whether that's a high-build primer surfacer or a topcoat. In collision repair, the most common types are epoxy and urethane-based DTM primers. Epoxy offers superior corrosion resistance and is often used for structural panels, while urethane DTM primers dry faster and sand more easily but may not hold up as well in extreme environments.

When Should You Use Direct to Metal Primer?
You should reach for direct to metal primer whenever the repair process exposes bare metal. That includes:
- **After grinding or sanding down to bare steel or aluminum** during dent repair or panel replacement.
- **On new replacement panels** that come with a factory e-coat but have been cut, welded, or damaged during fitment.
- **Around weld zones** where heat has burned off existing coatings and left raw metal.
- **On structural areas** like frame rails, shock towers, and inner structures that are prone to moisture trapping.
One critical rule: **Never apply DTM primer over old paint or a well-sealed surface.** It's designed for bare metal. If you use it over intact paint, it won't bond properly and can cause delamination later. Always strip the area to clean, bare metal before application.
How to Apply Direct to Metal Primer Correctly
Proper application is everything. Here's a step-by-step process that separates a professional repair from a quick spray-bomb job:
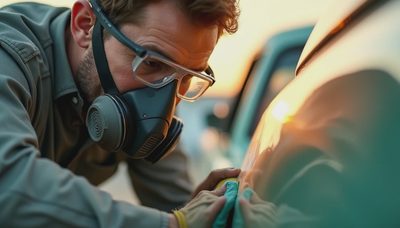
- **Surface preparation:** Use a wax and grease remover to eliminate any oil, silicone, or shop contaminants. Then scuff the metal with a fine-grit abrasive (180-320 grit) to create mechanical adhesion.
- **Clean again:** Wipe down with a tack cloth and another pass of degreaser. Even a fingerprint can cause fisheyes.
- **Mix according to manufacturer specs:** Most DTM primers require a specific activator-to-base ratio. Don't guess — use a mixing cup and follow the label.
- **Apply thin, even coats:** Two to three medium coats are better than one heavy coat. Heavy coats trap solvent and lead to cracking or poor adhesion. Allow proper flash time between coats (typically 5-15 minutes depending on temperature).
- **Let it cure:** DTM primer needs time to fully cross-link. Follow the recommended cure time before sanding or topcoating — often overnight for epoxy, a few hours for urethane.

Common Mistakes That Ruin the Repair
Even experienced DIYers and some body shops make these errors:
- **Applying over rust or mill scale.** The primer needs a clean, sound metal surface. Rust flakes will cause the coating to fail from underneath.
- **Skipping the metal prep step.** If you spray DTM primer onto polished or oily metal, it won't stick. Period.
- **Using the wrong primer for the metal type.** Aluminum needs a different formulation than steel. If your DTM primer isn't labeled for aluminum, don't use it on an aluminum panel.
- **Not allowing enough cure time before sanding.** Sanding too soon clogs the abrasive and can lift the primer from the metal surface.
- **Applying too thick or too thin.** A thick coat looks sealed but traps solvents; a thin coat leaves pin-holes. Both invite corrosion later.
Why Skipping Direct to Metal Primer Costs You More
Some shops skip DTM primer to save time or money. They might shoot a standard primer over bare metal with a quick etch wipe, or just go straight to a high-build primer. The result? The paint system lacks a true corrosion barrier. Within months — especially in northern states with road salt — rust creep starts at the edges of the repair, often showing as bubbles under the paint. That leads to a return visit, more labor, and a disgruntled owner. For a daily driver, that means a compromised repair that accelerates structural decay. For a collector car, it ruins the value.
Also consider diminished value. A car with a prior collision repair that has trace rust or peeling paint is worth significantly less than one with a proper, documented repair that included DTM primer. Twenty bucks worth of primer can save thousands in future bodywork and resale loss.
Final Thoughts
Direct to metal primer is not an optional step — it's the foundation of a lasting repair. Whether you're sectioning a frame rail or blending a quarter panel, take the time to prep the metal and apply the right DTM primer. Your car will thank you with decades of rust-free service, and the next owner will appreciate a repair that holds up as well as the original paint.


No notes yet — write the first.