Wondering how to paint over chrome plated plastic without the finish peeling in a week? Chrome on plastic is a stubborn surface. The slick layer that looks great on a bumper is exactly what makes paint adhesion a nightmare. But with proper prep, you can get paint to stick and look factory-fresh. This guide covers the process from start to finish, so you don't end up with flaking.
Tools and Materials You Will Need
Gather isopropyl alcohol or wax remover, 320- and 400-grit sandpaper or scuff pads, an adhesion promoter for chrome (like SEM 39843), high-build automotive primer, flexible paint matched to your vehicle, clear coat, and a spray gun or aerosol cans. Also grab tack cloths and a respirator. Having everything on hand prevents rushing.
Why Chrome Plastic Is So Hard to Paint
The chrome layer on plastic parts is not actual metal. It is a thin metal deposit on the plastic substrate via vacuum metallization or electroplating. That surface is extremely smooth and non-porous. Paint has nothing to grip. Even a direct coat will bond weakly. Scratches, chips, and peeling are almost guaranteed unless you break the surface properly.
Step 1: Clean and Degrease Thoroughly
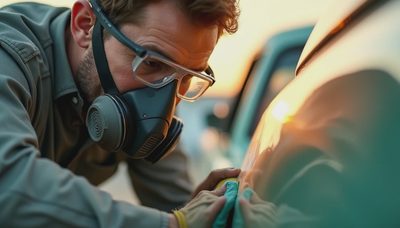
Before any sanding, the part must be free of wax, grease, and dirt. Use a dedicated wax remover or isopropyl alcohol (at least 70%). Wipe it down multiple times. Any contamination will be sanded into the surface, causing adhesion problems later. Wear gloves to avoid skin oils.
Step 2: Sand the Chrome Surface
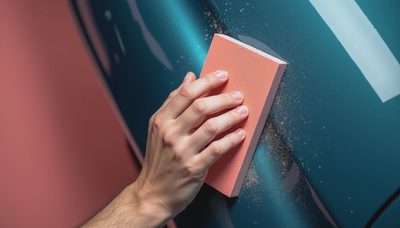
Sanding is the most critical step when learning how to paint over chrome plated plastic. Scuff the chrome so primer has a mechanical bite. Start with 320-grit if chrome is thick, then move to 400-grit. If chrome is thin (common on aftermarket parts), you may cut through quickly. Do not sand through to bare plastic in one area — aim for an even, dulled surface. For small parts, use a gray scuff pad. Rinse after sanding and dry completely.
Step 3: Apply a Dedicated Adhesion Promoter
Standard primer may not stick to chrome even after sanding. You need an adhesion promoter designed for chrome or non-porous plastics. Products like SEM 39843 or Bulldog Adhesion Promoter work well. Spray a light, even coat and let it flash off as instructed. This creates a chemical bond bridging chrome and paint layers. Do not skip it — this often determines whether the job lasts.
Step 4: Prime the Part
Once the adhesion promoter is dry, apply a high-quality automotive primer. Use a sandable primer if you plan to smooth imperfections. Two to three light coats are better than one heavy coat. Let each coat flash before the next. After primer is cured, lightly sand with 400-600 grit to knock down orange peel. Clean dust before painting.
Step 5: Paint with a Flexible Coating
Because the plastic can flex, use a paint with flex agents. Most automotive acrylic urethane paints are fine, but if the part bends (like a bumper trim), consider a flex additive. Apply color in thin, even passes. Three to four coats typically cover well. Hold the can or gun 8-10 inches away. Let each coat flash properly. If using aerosols, warm them in warm water for five minutes for better atomization.
Step 6: Clear Coat for Protection
A clear coat is essential for UV protection and durability. Use a two-component clear if possible; single-stage clears are less durable. Apply two to three coats with proper flash time. Once dry, you can wet-sand and polish for gloss, but many DIY projects find the clear itself sufficient.
Common Mistakes to Avoid
One of the biggest errors when attempting how to paint over chrome plated plastic is skipping the adhesion promoter. Another is rushing drying times. Paint needs to off-gas solvents properly or it remains soft. Also, avoid thick coats — they lead to runs and uneven texture. For parts exposed to winter salt, consider an extra clear coat and ceramic coating.
Can You Use Rattle Cans?
Yes, but choose carefully. Not all spray paints are formulated for plastic or chrome. If you attempt how to paint over chrome plated plastic using rattle cans, look for bonding primer or all-surface paint. Krylon Fusion and Rust-Oleum Specialty Plastic Primer are options, but they still need sanding and adhesion promoter. Spray-bomb jobs are less durable than professional finishes but can last a couple of years with meticulous prep.
When to Call a Pro
If the part is large, textured, or structural, consider a professional body shop. Shops have better equipment, temperature-controlled booths, and industrial paints. Cost is usually a few hundred dollars, including warranty. If the part is small and easy to remove, DIY is fine. But remember: prep is everything.
Final Thoughts
When you commit to learning how to paint over chrome plated plastic, follow every step: clean, sand, adhesion promoter, prime, paint, clear. The chrome surface is engineered to repel coatings; you must defeat that with grit and chemistry. Do it right, and the finish looks factory. Cut corners, and you will redo the job in months. The evidence is in the prep. Now go get that part prepped.
No notes yet — write the first.