If your car has been through a collision repair, the quality of the paint job depends almost entirely on one thing: prepping a car for paint the right way. Skipping steps or taking shortcuts here is what separates a repair that looks good for years from one that starts peeling, bubbling, or chipping within months. Whether you're doing the work yourself or evaluating a body shop's process, understanding what proper surface preparation involves will save you time, money, and a lot of frustration.
Why Paint Prep Matters More Than the Paint Itself
A $5,000 paint job applied over poorly prepped metal is worth less than a $1,000 job over a properly prepared surface. In collision repair, the underlying damage—dings, rust, old paint contaminants, and filler—must be addressed before a single drop of color goes on. If the preparation is rushed, the new paint has nothing to bond to. Blisters, fish eyes, and crazing are not manufacturing defects; they are prep failures. A reputable body shop will spend two to three times as many hours on prep as on the actual spray work. If your repair estimate shows only a few hours of prep time for a full panel repaint, that is a red flag.

The Step-by-Step Process for Prepping a Car for Paint
Proper surface preparation follows a sequence that cannot be skipped or reordered. Here is what it looks like in a professional setting:
- Strip the old finish. For panels with cracking, deep scratches, or previous poor repaints, the old paint needs to come off. This is done with chemical strippers or sanding down to bare metal. In structural repairs, weld-through primer is applied to bare joints before new metal is installed.
- Sand and feather edges. Even if the old paint is intact and only a small section is being repaired, the transition area must be feathered out. Using a gradual grit progression—starting at 80-grit for rough shaping, moving to 180, then 320—creates a smooth taper so the new paint does not leave a raised edge.
- Apply body filler if needed. Dents and low spots are leveled with polyester filler. The key here is consistency: too much hardener causes cracking; too little leaves it soft. For structural areas, avoid thick filler applications—more than 1/4 inch indicates the panel should be replaced.
- Block-sand and check straightness. After filler cures, block-sanding with a long board ensures the panel is straight. Use a guide coat—a thin mist of dark spray—to highlight low spots when sanded. Repeat until the panel is dead flat.
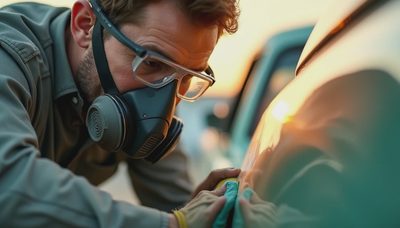
- Clean thoroughly. Any residue from sanding dust, grease, silicone, or hand oils will ruin adhesion. A wax-and-grease remover is mandatory. Many shops also use a tack cloth before primer.
- Primer and seal. A high-build primer fills minor scratches and provides a uniform surface. After primer, a final sanding with 400–600 grit, then a sealer coat that is compatible with the top coat. This step is where a lot of cheap prep goes wrong—using the wrong primer for the paint system (e.g., lacquer primer under urethane paint) leads to lifting.
Common Mistakes in Prepping a Car for Paint
Even experienced DIYers make errors that compromise the job. Here are the most costly ones:
- Sanding with too fine a grit initially. Starting with 400-grit on bare metal leaves the surface too smooth for mechanical adhesion. Always start coarse (80–120) and work up.
- Neglecting to back-prime. When stripping a panel to bare metal, the backside needs primer to prevent rust from the inside out. Shops that skip this are setting you up for corrosion within a year.
- Using cheap masking tape. Standard blue painter's tape bleeds or leaves residue. Use automotive-grade fine-line tape for crisp edges.
- Skipping the guide coat. Without it, you cannot see low spots until after paint—by then it is too late.
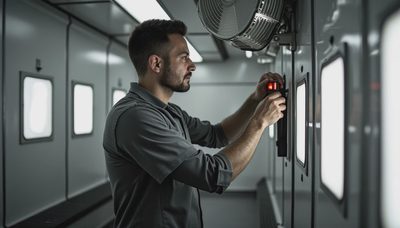
- Painting in poor environmental conditions. High humidity, cold temperatures, or direct sunlight cause solvent pop, blushing, and orange peel. A proper spray booth controls temperature and airflow.

When to Hire a Pro vs. DIY
Prepping a car for paint is physically demanding and detail-intensive. If the vehicle has structural damage, multiple panels, or a metallic/pearl finish, leave it to a shop with a booth and experience. A full repaint of a sedan in a professional shop runs $3,000 to $8,000, with prep accounting for 60–70% of that. DIY costs can be under $500 for materials, but the time investment is easily 40–80 hours, and mistakes are expensive to fix. For a single panel or a cosmetic touch-up on an older car, a motivated owner can get good results if they follow the steps above meticulously.
How Poor Prep Affects Resale and Insurance Value
On CrashFile Garage, we see cases where a car comes off the repair as cosmetically clean but structurally suspect. Poor paint prep is not structural—until moisture gets beneath the paint and starts rusting the repaired metal. That rust weakens the panel and, in severe cases, compromises corrosion protection. A vehicle with bubbling paint after a professional repair is prima facie evidence of a prep shortcut. If you are filing an insurance supplement, document the prep steps and ask for evidence of guide coats, sanding grits, and primer type. An insurer that paid for a full respray expects a lasting result; if the shop skipped steps, diminished value applies.
Final Check: What the Paperwork Should Show
Before you hand over the keys or close a claim, review the repair order. Look for line items like "sand entire panel to bare metal," "apply epoxy primer," and "block-sand with 180, 320, 400." If the estimate lumps prep into a single line with no detail, push back. A proper prepping a car for paint process is documented line by line—anything less is a gamble.

No notes yet — write the first.